Cleaning a humidifier safely starts with the exact design and manual, not with a universal vinegar, bleach, peroxide, or dishwasher recipe. The water tank, basin, ultrasonic plate, heating area, wick, filter, float, and electrical base can each have different cleaning permissions. A practical routine separates ordinary water handling from scale removal, disinfection, consumable replacement, and storage. The goal is a clean humidifier without soaking a part that should stay dry, scrubbing a component that should be replaced, or using a chemical the manufacturer never approved.
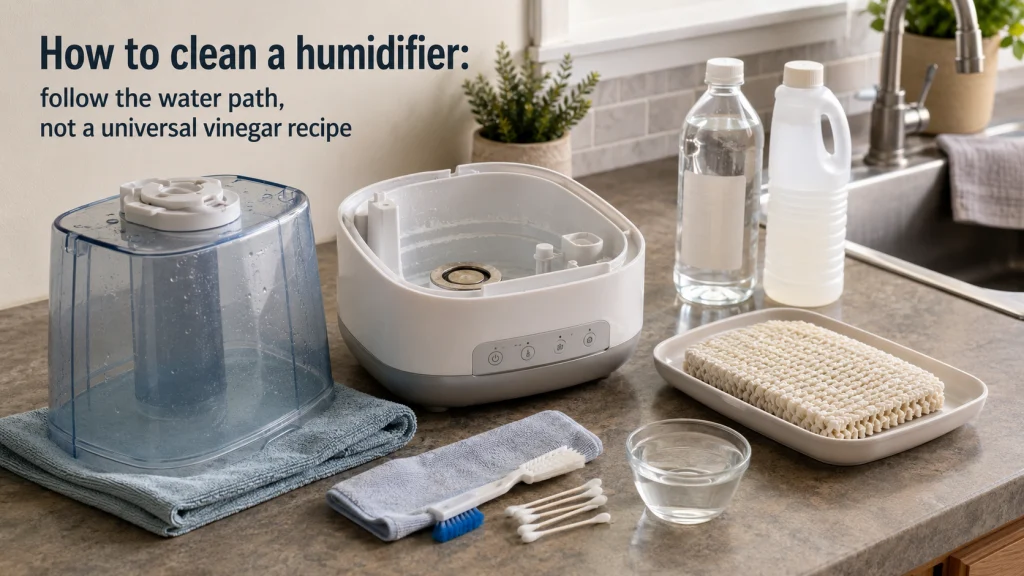
One cleaning recipe does not fit every humidifier
How to clean a humidifier sounds like a simple kitchen-cabinet problem until two machines are placed side by side. One may move water across a wick, another may vibrate water at an ultrasonic plate, and a warm-mist design may expose an owner-accessible heating area that must cool before cleaning. Those parts do not tolerate the same handling, even when the tanks look similar from the outside. The safest starting point is therefore the water path inside the exact unit, not the cleaner someone used on a different machine.
The recurring mistake is to treat vinegar, bleach, peroxide, soap, or a dishwasher as a universal method. Cleaning instructions may separate scale removal from disinfection, exclude a wick from chemical contact, limit water around an electrical base, or name only certain removable pieces as washable. The practical sequence is simple once those permissions are clear. Identify the design, unplug and cool the unit where needed, decide whether the job is routine water care, scale removal, or disinfection, clean only permitted parts, then rinse, dry, and reassemble as directed.
- Identify the humidifier type and the parts that contact water.
- Unplug the unit and let heated parts cool where applicable.
- Choose the job: routine water care, scale removal, disinfection, or consumable replacement.
- Clean only the parts and surfaces the instructions allow.
- Rinse, dry, and reassemble before the next use.
That workflow does not make the cleaning method universal. Ultrasonic surfaces, wicks, heated areas, and electrical bases still need different handling. The sections below follow those decision points in order. Start with the machine in front of you, not a recipe borrowed from another one.
Warning: Do not mix cleaning chemicals, improvise concentrations, or assume that a cleaner permitted for one part is permitted for the whole humidifier. Follow the cleaning section for the model you own. Keep separate cleaning processes separate. Complete the required rinse before the unit returns to service.

The set includes a large brush and a small brush with a wiper blade for different detail-cleaning jobs. The small brush is designed for fixtures and other tight spaces, and both brushes use durable nylon bristles. Soft non-slip grips provide a controlled hold while working around small removable parts.
Check On AmazonIf you click this link and buy, we earn a commission at no additional cost to you.
Identify the humidifier design and find the exact cleaning section
Start by identifying whether the unit is ultrasonic, evaporative, warm mist, or a larger console design, then find the cleaning and maintenance pages for its model number. The distinction matters because the component that actually turns water into moisture changes with the architecture. An ultrasonic model may have a small misting or nebulizing surface, an evaporative model may depend on a wet wick, and a warm-mist unit may place scale around a heating area. If those labels are still unclear, the comparison of evaporative and ultrasonic humidifiers explains what is physically different inside the two common cool-mist designs.
Do not stop at the product family name when model instructions are available. Two humidifiers of the same broad type can differ in removable parts, dishwasher permissions, filter care, basin access, and cleaning tools. Those instructions also show what the owner is meant to reach and what should remain closed. That boundary matters around motors, control panels, sealed housings, wiring, and service-only areas.
| What you find | What usually needs attention | What to verify before cleaning |
|---|---|---|
| Ultrasonic design | Tank, water basin, misting or nebulizing surface | Approved cleaner, approved tool, and whether the base may be rinsed |
| Evaporative design | Tank, basin, float, wick or filter area | Whether the wick is rinseable, soakable, or replace-only |
| Warm-mist design | Tank, reservoir, removable chamber, owner-accessible heating area | Cooling requirement, scale-removal method, and parts that must stay out of running water |
| Console design | Larger tanks or reservoirs, wick assemblies, floats, removable housings | Water-change routine, filter handling, and which sections are owner-serviceable |
The table is a router, not a substitute for the product instructions. Match the cleaning method to the water-making system and part. This keeps a valid instruction from one design from being carried into another where it may be ineffective or damaging. It also organizes the rest of the job.
Unplug the unit and let hot components cool before cleaning
Water and powered electrical equipment are a bad combination, so owner cleaning starts with the unit switched off and unplugged. Emptying a tank is not enough if the base still contains water near controls, vents, or internal electrical parts. Move the humidifier to a water-resistant work area only if the manual allows normal carrying after shutdown. If the cord, plug, housing, or base shows damage or water has entered an electrical area, stop using the unit rather than turning cleaning into a repair attempt.
Warm-mist and steam-producing units add a second concern: retained heat. A machine that has stopped producing mist can still have hot water or a hot heating surface inside, so follow its cool-down instruction before touching the owner-accessible heating area. Do not speed that process by pouring cold water onto hot components unless the manual specifically tells you to do so. The safe sequence is power off, unplug, cool where applicable, then disassemble only as far as the owner instructions permit.
Separate routine water handling from deeper cleaning
Not every maintenance session needs to become a full chemical clean. Daily or after-use water handling, when the product instructions call for it, is the basic routine: empty old water, rinse the tank or basin as permitted, and let cleaned water-contact parts dry before refilling or storage. EPA care guidance likewise emphasizes frequent water changes and regular cleaning rather than letting water sit indefinitely. Deeper cleaning is a separate job for mineral scale, film, or contamination that the ordinary rinse-and-dry cycle does not remove.
The deeper-clean schedule still varies by manufacturer, water quality, use pattern, and design. Mineral-rich water may produce scale sooner, while a wick may reach replacement condition before a hard plastic tank looks dirty. Use the model’s maintenance schedule for descaling, disinfection, and consumable care instead of borrowing a weekly formula from another machine. The broader humidifier use routine also matters because water choice and refilling habits change the cleaning burden.
| Maintenance job | Purpose | Typical owner action | What controls the method |
|---|---|---|---|
| Daily or after-use water handling | Reduce standing water and loose residue | Empty, rinse or wipe, dry where directed, refill with permitted water | Tank and basin design, use pattern, product instructions |
| Scale removal | Loosen mineral deposits | Use only the approved descaling agent, tool, and contact area | Material, heating surface, ultrasonic surface, exact manual |
| Disinfection or microbial cleaning | Address contamination by the approved process | Use only the specified agent and rinse procedure | Manufacturer instructions and part washability |
| Consumable care | Maintain airflow or water transfer | Rinse, soak, rotate, or replace only as directed | Wick or filter construction and exact part instructions |
Decide which job you are doing before reaching for a cleaner. Standing water may call only for the empty-rinse-dry cycle, while mineral crust may need descaling. Match the method to both the residue and the component. That keeps daily care from becoming unnecessary chemical cleaning.

These 16 x 12-inch microfiber cleaning cloths are ultra-soft, non-abrasive, reusable, and machine washable. They can be used dry or with liquid cleaners for lint-free, streak-free wiping. This variant contains 24 cloths in blue, white, and yellow.
Check On AmazonIf you click this link and buy, we earn a commission at no additional cost to you.
Empty, rinse, and dry tanks and basins only as the manual permits
The tank is the obvious part to clean, but the basin below it often feeds the humidifying mechanism. Empty both areas when the design allows it, following the stated direction for pouring water out of the base. Some bases have vents, controls, or openings that should never receive rinse water. A clean humidifier is not one flooded from every angle.
Use a soft cloth, soft brush, or supplied cleaning tool only where that tool is permitted. Tight corners can tempt owners to reach for metal picks, abrasive pads, or stiff brushes, yet scratches can damage coated or sensitive surfaces. Dishwasher use also needs part-level confirmation rather than a guess based on sturdy-looking plastic. If only certain removable pieces are listed as dishwasher-safe, that does not automatically include the tank, base, cap, sensor, or any other piece.

These Zero Scratch scrub sponges are designed for effective, gentle scrubbing on many household surfaces, including nonstick cookware, countertops, glass, tubs, and showers. The scrubbing fibers are made with 100 percent recycled plastic. The sponges can be sanitized on the top rack of a dishwasher up to 20 times.
Check On AmazonIf you click this link and buy, we earn a commission at no additional cost to you.
Treat mineral scale and microbial cleaning as different jobs
White or crusty deposits usually point to minerals left behind as water evaporates, while slippery film, discoloration, or odor raises a different cleaning question. Scale removal and disinfection are not interchangeable goals, even when a manufacturer permits both processes on the same humidifier. An acid-based descaling instruction may target mineral deposits, while a separate disinfecting instruction may use a different agent and a different rinse process. The important point is not which household chemical is popular, but which process the exact manual approves for the exact surface.
EPA guidance reinforces following product-specific cleaning directions and thoroughly rinsing cleaned water-contact surfaces. Real manufacturer instructions show why a universal recipe is unreliable: vinegar may be permitted on a reservoir while excluded from a wick or another component. Do not combine cleaners or switch processes without completing the required rinse. If a chemical is not listed for the job, do not borrow a concentration from another model.
Chemical permission check: Confirm the cleaner, concentration or product form, allowed parts, contact method, rinse requirement, and any separation between descaling and disinfecting. Never mix cleaning agents. Do not extend one part-specific instruction to the rest of the machine. When the cleaning directions are silent, do not invent a chemical procedure.
That check prevents a common misunderstanding about vinegar. It can be a legitimate descaling agent when the maker specifies it, but “clean it with vinegar” is incomplete until the part, method, and rinse step are known. The same caution applies to bleach, peroxide, soap, descalers, and dishwasher detergent. Cleaning permission belongs to the component, not to humidifiers as a whole.
Clean ultrasonic misting surfaces gently and only by the approved method
Ultrasonic humidifiers use a small vibrating surface to create mist, so mineral buildup near that area can affect normal output. That does not make the plate a place for aggressive scrubbing. Cleaning directions may call for a soft cloth, soft brush, cotton swab, or supplied tool, but the cleaner and contact method can still vary. Never scrape the surface with a knife, metal pick, abrasive pad, or other hard object just because the deposit looks stubborn.
Pay equal attention to what surrounds the misting surface. A basin can look washable while still being integrated into an electrical base that should not be submerged or held under a faucet. Clean the reachable water-contact area and drain it in the stated direction. If scale returns quickly, water mineral content may be the problem rather than a need for harsher cleaning.
Treat evaporative wicks and filters as consumables when replacement is the instruction
An evaporative wick is not simply another washable plastic part. It is a porous water-transfer medium, and the fibers can harden, clog with minerals, deform, or lose useful absorption as they age. Some manuals allow limited rinsing or soaking in plain cool water, while others tell the owner to replace the wick when it becomes crusty, odorous, or ineffective. If the manual says not to use vinegar, soap, or another chemical on the wick, cleaning the tank with that agent does not change the filter rule.
This is why part-specific care beats a generic humidifier cleaning recipe. Scrubbing a disposable wick can damage its structure, and chemical soaking can leave a clean-looking part that no longer behaves as designed. Check the replacement information while the unit is open so you know whether the wick is reusable or consumable. When replacement is required, treat that cost as normal ownership rather than trying to make every filter permanent.
| Component | Possible status | Owner-level rule |
|---|---|---|
| Hard plastic tank or removable tray | Washable by an approved method | Use only the cleaner, rinse method, and dishwasher permission stated for that part |
| Ultrasonic misting surface | Cleanable but sensitive | Use only the approved soft tool and cleaner |
| Evaporative wick or filter | Rinseable, soakable, or replace-only | Follow the exact filter instruction rather than the tank-cleaning instruction |
| Motor housing or electrical base | Non-washable as a submerged part | Keep water out of electrical areas and wipe only where permitted |
Read the matrix by part, not by humidifier. One machine can contain washable pieces, sensitive cleanable pieces, consumables, and components that should never be immersed. That mixed status is why disassembly should stop at the documented maintenance boundary. If a part is not meant to be removed by the owner, do not turn maintenance into teardown.
Keep motors, control areas, and non-washable bases out of water
Many humidifiers collect water in a base that is physically attached to the motor, fan, control panel, or power electronics. The presence of a reservoir does not mean the whole base is a sink-safe container. Follow the stated drain direction, wiping method, and rinse limits, and never immerse an electrical housing. If water enters a control opening or another electrical area, stop using the unit and use the appropriate manufacturer or qualified-service path.
The same boundary applies when residue sits behind screws, sealed covers, or internal fan assemblies. Cleaning exposed maintenance areas is one thing; opening a housing can become electrical or mechanical service. A damaged cord, burning odor, sparks, overheating, uncontrolled operation, or leakage into electrical sections is not a signal to clean harder. Stop using the unit and use the appropriate service path instead.

The kit includes a 3-foot extendable handle and three Heavy Duty duster refills. Specially coated fibers and dust-busting strips are designed to grab dust from surfaces and reach into nooks and crannies. The extendable handle is intended for hard-to-reach areas such as vents, blinds, bookcases, and light fixtures.
Check On AmazonIf you click this link and buy, we earn a commission at no additional cost to you.
Rinse, dry, and reassemble without forcing floats, seals, or sensors
Once the cleaning process is complete, rinse every part that is meant to be rinsed until the specified residue is gone. Cleaning agents left in a tank or basin can be carried into the next operating cycle, so the rinse is part of the method rather than an optional finishing touch. Dry parts as directed before putting the unit back together, especially when the humidifier is being stored rather than immediately refilled. Keep non-washable electrical areas dry throughout the process.
Reassembly deserves more care than it usually gets. Floats, caps, valves, seals, filter frames, mist chimneys, and sensor-related pieces may need to sit in a specific orientation before the tank feeds water correctly or the unit recognizes that it is assembled. If something no longer fits with normal hand pressure, return to the manual instead of forcing it. A cleaning session should not end with a pinched seal, jammed float, misaligned wick, or leak created during reassembly.
Route white dust and persistent no-mist problems to the right next check
Cleaning can remove deposits, but it does not make every symptom a cleaning problem. If an ultrasonic humidifier keeps leaving pale mineral residue on nearby surfaces, the issue may be the mineral content of the water and the way that design disperses minerals. The dedicated article on humidifier white dust separates that mineral-residue problem from ordinary dirt inside the tank. Repeatedly scrubbing the unit will not fix the water source if mineral carryover is the real cause.
Likewise, if proper cleaning restores the water path but the humidifier still does not produce normal output, move to owner-level troubleshooting rather than escalating the chemical strength. Check correct reassembly, water level, wick condition, float position, and any model-specific reset or maintenance step before assuming an internal failure. The humidifier not producing mist troubleshooting path covers that next decision. If the instructions point to internal service, the cleaning job is finished even if the symptom is not.

The TDS-3 measures total dissolved solids from 0 to 9990 ppm with 1 ppm resolution and a stated readout accuracy of plus or minus 2 percent. A hold function saves measurements for easier reading and recording. It also includes a built-in digital thermometer and an automatic shutoff after 10 minutes of non-use.
Check On AmazonIf you click this link and buy, we earn a commission at no additional cost to you.
Clean and dry the humidifier before off-season storage
Storage should begin with the appropriate cleaning cycle followed by thorough drying of the parts meant to be dried. Leaving water in a tank, basin, wick, or cartridge creates a poor starting point for the next use. Handle used consumables according to their storage instructions rather than sealing them damp inside the machine. Store the dry unit where tanks, seals, and removable parts will not be crushed or distorted.
When the humidifier returns to service, inspect it before adding water. Look for dust, damaged seals, brittle parts, old consumables, and residue in the water path. Reinstall only the correct filter, wick, cartridge, or accessory for the exact model. A brief inspection can catch a leak risk or blocked path before the machine runs.
- Complete the manufacturer-approved cleaning process.
- Remove standing water from tanks and owner-accessible reservoirs.
- Dry every part the manual says should be dry for storage.
- Dispose of or replace consumables when the storage instructions call for it.
- Keep the cord, seals, floats, and removable pieces protected from damage.
- Inspect and clean again as directed before returning the unit to service.
The storage checklist stays simple because the exact chemical procedure still belongs to the manual. The goal is to avoid putting a clean machine away wet. Special cartridge, wick, or heated-component storage instructions take priority when the model has them. Storage is part of the maintenance cycle, not a separate household chore.
Make cleanability part of the next humidifier purchase
Cleaning burden is an ownership feature, even when it is not prominent on the product box. A wide tank opening, removable water-contact parts, clear basin access, and simple maintenance directions can matter more than another display mode. Consumer testing also treats ease of cleaning as a convenience factor because water-contact surfaces need recurring attention. A large tank that saves refills but is awkward to drain, scrub, or dry can simply trade one chore for another.
Before buying, read the maintenance section for the specific model rather than relying only on a feature list. Check whether the unit uses a wick or filter, what parts are replaceable, which pieces come out for cleaning, how the base is drained, and whether a dishwasher-safe claim names the actual components. The humidifier buying guide can help place that cleaning burden alongside output, noise, room fit, water handling, and recurring consumables. For a wider view of related equipment decisions, the heating, cooling, and air quality section keeps the comparison focused on household fit rather than feature count.

The Classic 300S is a 6-liter ultrasonic humidifier with a top-fill design and a wide opening intended to make cleaning easier. Amazon lists easy cleaning and top fill among its special features, with coverage up to 505 square feet. Smart app control, Auto Mode, Sleep Mode, and a stated runtime of up to 60 hours add operating flexibility.
Check On AmazonIf you click this link and buy, we earn a commission at no additional cost to you.
Final Thoughts: Follow the water path, not a universal recipe
The right cleaning method follows the humidifier’s water path, materials, removable parts, and documented maintenance instructions. Emptying and drying old water, removing scale, disinfecting when directed, caring for a misting surface, and replacing a wick are related jobs, but they are not the same job. Identify the part you are touching, then use the cleaner, tool, rinse method, and access level specified for that component. That approach is more reliable than applying one recipe to every machine.
If maintenance feels awkward every time, treat that friction as useful buying information. Easy access, understandable instructions, replaceable consumables, and a base that drains without wetting controls all have household value. A simpler unit that is easy to maintain may fit better than a feature-heavy model with a complicated water path. Cleanability belongs in the ownership decision from the start.
Frequently asked questions
🧽 How do you clean a humidifier without damaging it?
Identify the model, unplug it, and follow the cleaning directions part by part. Clean only the water-contact surfaces meant for owner care with the specified cleaner and tool, then rinse and reassemble as directed.
🍶 Can I use vinegar to clean every humidifier?
No. Vinegar is approved for some models and parts, but other components such as certain wicks, scent areas, or electrical sections may exclude it. Use the exact model instructions instead of transferring a recipe from another humidifier.
🧴 Can I use bleach or peroxide in my humidifier?
Only when that agent is explicitly permitted for the model and part. Do not invent a concentration, combine cleaners, or assume a disinfecting method also works as a descaling method.
🧺 Can humidifier parts go in the dishwasher?
Only parts specifically identified as dishwasher-safe should go in the dishwasher. A removable plastic piece may be permitted while the tank, base, cap, sensor, or other parts are not.
🌫️ Should I wash an evaporative humidifier wick?
Check the wick instructions. Some designs allow limited rinsing or soaking, while others treat the wick as a consumable that should be replaced rather than chemically cleaned or scrubbed.
🪨 Why does scale come back after I clean the humidifier?
Scale comes from minerals left behind by the water, so repeated buildup can reflect water mineral content as much as cleaning technique. Follow the model’s water guidance and investigate white-dust or mineral-residue issues separately from ordinary tank cleaning.
References and Sources
- U.S. EPA humidifier care guidance: Supports routine water handling, cleaning importance, mineral-scale concerns, thorough rinsing, and manufacturer-first cleaning instructions.
- Honeywell humidifier cleaning guidance: Supports separating scale removal from disinfection and treating filter care differently from hard water-contact parts.
- Vicks humidifier cleaning guidance: Supports model-specific warm-mist and cool-mist cleaning procedures and the boundary against immersing electrical bases.
- Honeywell wicking filter care: Supports the replace-versus-clean distinction and the warning against chemical cleaning of certain evaporative wicks.
- Consumer Reports humidifier testing: Supports treating ease of cleaning as a practical convenience factor when comparing humidifiers.