Cleaning a dehumidifier safely starts with the exact model manual, not a generic recipe for vinegar, bleach, coil spray, or panel removal. The useful cleaning work is usually limited to owner-accessible parts such as the bucket, filter, exterior grilles, and any drain or pump filter the manufacturer specifically makes serviceable. The goal is to restore airflow and keep the water path clean without sending liquid into electrical areas or turning routine maintenance into a refrigeration repair. By the end, you should know what to clean, what to verify first, and where owner maintenance should stop.
Start with what your exact model was designed to let you remove
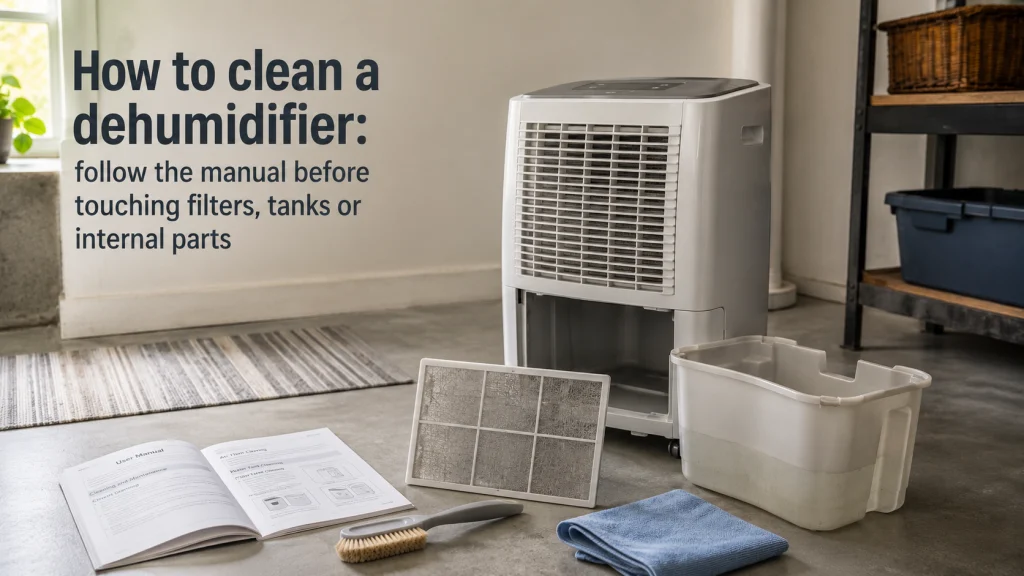
If you are figuring out how to clean a dehumidifier, the safest first move is not to reach for a cleaner. Find the model number, open the matching manual, turn the unit off, and unplug it before touching the bucket, filter, drainage parts, or grilles. A dehumidifier combines water collection, moving air, electrical controls, and a sealed refrigeration system, so an innocent-looking cleaning step can cross into parts the owner was never meant to service. The manual tells you which parts are removable and which cleaning methods the manufacturer actually allows.
Internet advice often treats all dehumidifiers as if they were built the same way. Some models provide a sliding filter, removable bucket, and pump filter with an owner-cleaning procedure, while another model may give you no legitimate access beyond the filter and tank. One current Midea manual, for example, tells the owner to unplug before cleaning, use mild detergent on specified surfaces, wash the removable air filter with clean water, and clean a pump filter only on pump-equipped models. The useful rule is simple: clean what your machine exposes on purpose, and do not create access by taking the cabinet apart. Maintenance across air quality appliances should stay tied to the exact model, especially when water, filters, and electrical components share the same housing.
Warning: Unplug the dehumidifier before routine cleaning. Stop if you find a damaged cord, overheating, water entering electrical areas, or exposed wiring. Do not open the housing for normal cleaning unless the manual explicitly provides an owner procedure. Work on the sealed refrigeration system belongs to qualified service.
A model check also prevents a common first-time mistake: treating the filter, tank, and drainage system with the same cleaner. Materials and approved methods vary by component. Keep the manual nearby while removable parts are out. That makes correct cleaning and reassembly easier.

This compact S1000 flashlight has a zoomable beam and five light modes for close inspection work. Its handheld body is made from aluminum. The selected one-pack variant includes batteries, making it useful for reading model labels and checking exterior access points before cleaning.
Check On AmazonIf you click this link and buy, we earn a commission at no additional cost to you.
Separate owner-accessible parts from internal refrigeration and electrical assemblies
Before cleaning, divide the machine into two zones. The first contains parts the manufacturer expects you to reach during normal ownership, such as the bucket, removable filter, exterior intake and outlet surfaces, drain connections, and sometimes a pump filter. The second contains parts that may be visible through openings but are not automatically owner-serviceable, including internal coils, the fan assembly, wiring, sensors, compressor connections, and components behind the cabinet. Visibility is not permission to spray, scrub, vacuum, or disassemble.
This distinction matters more than how dirty a part looks. Dust behind a grille can tempt you to remove a panel because the debris seems close, but the service boundary is defined by the manual, not by reach. Midea safety instructions tell owners not to take apart or repair the unit themselves, while the cleaning section names the parts intended for routine care. If reaching the dirt requires housing removal, an undocumented fastener, or liquid near internal electrical or refrigeration components, routine owner cleaning has ended.
| Component | Typical owner access | What to verify | Stop point |
|---|---|---|---|
| Air filter | Often removable | Washable or replaceable, removal direction, drying requirement | Do not force the frame or wash an unapproved filter |
| Water bucket | Normally removable | Approved cleaner, float handling, correct seating | Keep water away from electrical contacts |
| Exterior grille | Accessible from outside | Approved brush, vacuum, or damp-cloth method | Do not direct water into the cabinet |
| Drain hose | Model dependent | How it disconnects and whether flushing is specified | Do not improvise access to internal drain passages |
| Pump filter | Only on some pump models | Exact removal and cleaning procedure | Stop if no owner procedure is provided |
| Internal coils | Usually not routine owner access | Whether the manual explicitly gives an owner procedure | Do not remove panels or spray internal parts based on generic advice |
Use the table as a routing check, not permission to perform every task. Similar-looking machines can expose different parts and specify different cleaners. If your manual is more restrictive than generic advice, follow the manual. That rule matters especially for the filter and water path.

This two-brush set uses sturdy nylon bristles and soft non-slip grips for detail cleaning. The smaller brush includes a wiper blade for crevices, while the larger brush is angled for scrubbing. The two sizes give you controlled options for owner-accessible surfaces and tight exterior details where brushing is permitted.
Check On AmazonIf you click this link and buy, we earn a commission at no additional cost to you.
Clean the exterior intake and outlet surfaces using the manual-approved method
Exterior cleaning is mainly about keeping the airflow path clear without pushing moisture deeper into the machine. After unplugging the unit, remove loose dust from the intake and outlet areas using only the method your manual permits. Midea documentation for current models allows a vacuum cleaner or brush on the air intake and outlet and calls for water with a mild detergent on the grille and case, while warning against splashing water directly onto the unit. Frigidaire likewise tells owners to use a dampened cloth on the cabinet and keep excess water away from controls and vents.
The goal is not a showroom finish. You are preventing lint and dust from building up where air must enter and leave while keeping cleaning liquid on the exterior. A dripping cloth is a poor choice around controls, seams, and ventilation openings even if the cleaner itself is mild. Work from the outside and treat anything that requires reaching through the grille as a separate model-specific question.
- Unplug before wiping or brushing the unit.
- Use only the approved brush, vacuum attachment, or lightly damp cloth.
- Keep liquid away from controls, openings, cords, and electrical areas.
- Avoid abrasive products or harsh chemicals unless the manual allows them.
- Do not remove panels merely because dust is visible farther inside.
Once the airflow openings are clear, inspect the filter. Do not assume the exterior cleaning method applies to its material. It may have separate washing, drying, replacement, or reminder-reset instructions. Verify those before using water.
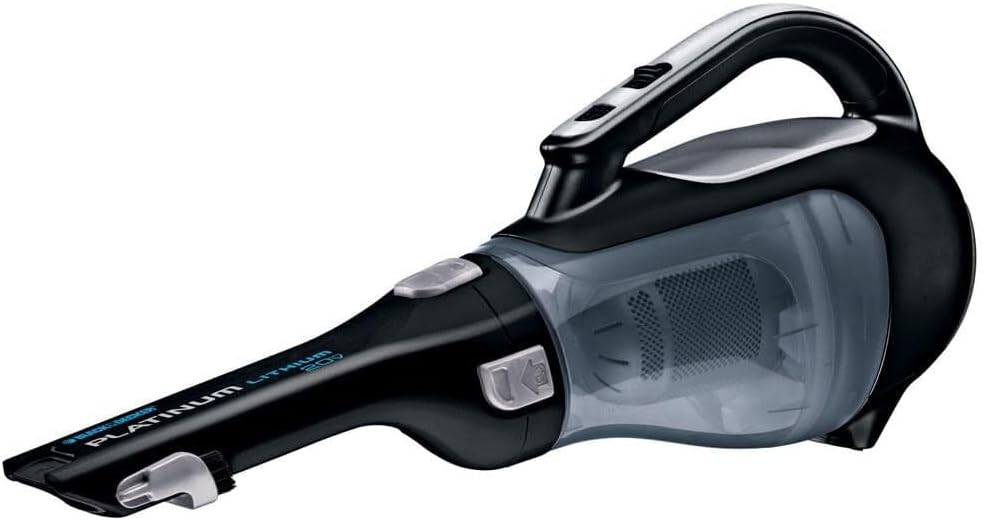
This cordless 20V hand vacuum includes an extendible crevice tool and a flip-up brush for targeted pickup. Its handheld rechargeable design is easier to position around exterior grilles than a full-size vacuum. The BDH2000L package also includes a charging base for storage between cleaning sessions.
Check On AmazonIf you click this link and buy, we earn a commission at no additional cost to you.
Remove and clean or replace the air filter exactly as specified
To clean a dehumidifier filter correctly, first verify what kind of filter the unit uses. Do not assume every removable filter should be washed under a faucet just because many common dehumidifiers use washable mesh filters. Current Midea instructions for certain models tell the owner to wash the filter with clean water and dry it before reinstalling, while GE support instructions for certain dehumidifiers specify warm soapy water and complete drying. The manufacturer decides the cleaning method, not the generic product category.
Removal matters too. A filter may slide from the rear, pull from the side, sit behind a grille, or become accessible only after the bucket is removed. If the frame resists movement, check the diagram instead of flexing or prying it, because a damaged frame can leave gaps in the airflow path. After cleaning, let the filter dry as specified and reinstall it fully before operation.
- Confirm that the exact filter is identified as washable rather than replaceable.
- Check the approved cleaning method and whether any cleaner is permitted.
- Verify how thoroughly the filter must dry before it goes back into the unit.
- Check whether the model uses a filter reminder that needs resetting after maintenance.
If the manual specifies replacement, do not wash the filter to extend its life. If the instructions allow washing, follow the stated method instead of substituting a stronger cleaner or a different drying shortcut. A filter that looks clean but is damp, damaged, or incorrectly seated can create a new airflow problem after maintenance. These checks turn a generic rinse into a model-specific cleaning decision.
Empty and clean the water bucket with only the approved cleaner and method
The water bucket is often the part that makes cleaning a dehumidifier feel urgent. Standing condensate, residue around corners, and slippery film can develop long before the exterior looks dirty. Midea instructions for multiple models specify clean water with a small amount of mild detergent, followed by emptying and rinsing, and they warn against putting the bucket in a dishwasher. Frigidaire also directs owners to wash the bucket with mild soap and water, with model-specific instructions for removable bucket parts.
Do not turn a dirty bucket into a reason to create a universal chemical recipe. Advice online commonly recommends vinegar, bleach, oxidizers, or other additives as if plastic, seals, floats, pumps, and manufacturer instructions were identical across machines. GE documentation for some dehumidifiers allows a diluted bleach solution in the reservoir, while the Midea instructions reviewed here use mild detergent for the bucket. That difference is exactly why you should use the cleaner named for your model and component, then rinse and reinstall the bucket correctly.
Key point: A cleaner approved for one brand, model, or component is not automatically approved for another. Match the chemical and method to the exact bucket instructions. Do not substitute a stronger cleaner simply because residue looks stubborn. The safer escalation path is the manufacturer support information for that model.
Watch the bucket float and seating surfaces while cleaning. A clean bucket that is not fully seated can keep the unit from operating. A displaced float can create a new problem that looks like a fault. Cleaning should not introduce another troubleshooting variable.

This cleaning set combines long-handle bottle brushes, a sponge brush, a spout brush, and narrow tube brushes. The longest bottle brush is 16 inches long, while the narrow brushes range from 7.9 to 12.5 inches. The mix of brush sizes can help reach corners and narrow areas on removable water-handling parts without requiring cabinet access.
Check On AmazonIf you click this link and buy, we earn a commission at no additional cost to you.
Clean a pump filter or drain hose only when the model provides an owner procedure
Continuous drainage and built-in pumps add another water path that can collect debris, but they do not give you permission to dismantle every hose connection you can find. Start with the drainage instructions for the exact model and identify which pieces are meant to disconnect without opening the cabinet. On a Midea pump-equipped model, the manual provides a specific owner procedure for removing and rinsing the pump filter or cleaning the screen with a soft brush or sponge. That is a good example of why a pump filter should be treated as a model-specific maintenance part rather than a universal one.
A gravity drain hose is usually simpler, but it still needs model-specific handling. If the manual tells you how to remove and flush the hose, follow that route and make sure the connection is secure before returning the unit to service. If the hose disappears into the cabinet with no owner-access instructions, stop at the connection rather than chasing residue deeper inside. A clogged internal passage, failed pump, leaking connection, or repeated drainage error belongs in troubleshooting or support after the normal owner-cleanable pieces have been checked.

This 6-foot drainage hose uses 3/4-inch female hose-thread connections with nickel-plated brass fittings. The listing specifies compatibility with standard 3/4-inch hose-thread outlets. Match that connection to the exact dehumidifier manual before using the hose for continuous drainage or replacing an existing owner-removable drain line.
Check On AmazonIf you click this link and buy, we earn a commission at no additional cost to you.
Treat coil access as model-specific instead of following generic spray advice
Dehumidifier coils are easy to overgeneralize because they are central to moisture removal and may be visible through an intake path. Some old manuals and generic articles describe coil-cleaning methods, while other manufacturers explicitly tell owners not to take the machine apart. Seeing dust on the fins through an opening does not establish that the coils are an owner-cleanable component. Tom’s Guide quotes Meaco guidance against dismantling a dehumidifier to clean the intake, coils, or exhausts, and current Midea safety documentation tells the owner not to take apart or repair the unit. The safest household rule is not “never touch a coil” or “always clean the coil,” but “follow the exact owner procedure for the exact model.”
If your manual does not provide a coil-cleaning procedure, do not remove panels, spray coil cleaner through openings, flood the fins, or improvise with compressed air. Those methods can move dirt, bend fins, wet electrical components, or cross into a sealed refrigeration area. Surface dust that can be removed from an exterior grille by the approved method is different from contamination inside a closed cabinet. When odor or performance problems remain after owner-accessible parts are clean, use troubleshooting or manufacturer support rather than escalating to deeper disassembly.
Let washable parts dry as required before reassembly and reconnecting power
Finishing the job correctly is more than sliding parts back into place. A washable filter, rinsed pump screen, bucket, or other removable piece needs to be dry to the degree specified by the manufacturer before the unit is powered again. Midea and GE instructions both tell owners to dry washable air filters before reinstalling them, and GE support guidance also tells owners to wipe the grille and case dry before plugging the appliance back in. This reduces the chance that cleaning moisture reaches places where it does not belong.
Reassembly is also a fit check. The bucket should sit fully in position, the filter should follow its tracks without gaps, the drain connection should be secure, and any pump filter or cover removed under the manual procedure should return in the stated order. Do not force a part that no longer fits after cleaning. A warped filter frame, displaced float, pinched hose, or misseated bucket can turn maintenance into a no-start, full-bucket, or leak complaint.
- Confirm each washed component has dried as required.
- Reinstall the filter in the correct orientation and fully seat it.
- Check the bucket float and bucket position before powering the unit.
- Reconnect only drain or pump parts covered by the owner procedure.
- Look for trapped cloth fibers, loose parts, or water near electrical areas.
After reassembly, the machine should return to normal operation without a new rattle or leak. If its behavior changed after cleaning, recheck the parts you removed first. Confirm the bucket, filter, float, hose, and covers are seated correctly. Do that before assuming an internal component failed.

These microfiber cloths are made from 85 percent polyester and 15 percent nylon and are designed to be soft, absorbent, and lint free. The 12-pack is reusable and color coded. Their soft construction makes them practical for wiping owner-accessible exterior surfaces and removing residual moisture from removable parts after the approved cleaning method.
Check On AmazonIf you click this link and buy, we earn a commission at no additional cost to you.
Use the manufacturer schedule and operating conditions instead of one universal calendar
There is no single cleaning interval that fits every dehumidifier in every room. Filter loading changes with dust, lint, pets, open windows, nearby laundry, renovation debris, and how heavily the machine runs. Bucket cleaning depends on how quickly water collects, whether the unit uses continuous drainage, and whether residue or odor begins to appear. Manufacturer reminders are useful, but they should be read as the starting point for your model rather than a universal rule.
The manuals themselves show why a fixed internet schedule is too crude. Some models use a stated interval under normal operating conditions, while others use an operating-hour indicator or tell the owner to inspect the filter and clean it as needed. A unit in a dusty utility area can load its intake faster than a lightly used machine in a clean finished room. Combine the model’s schedule with what you can actually see at the filter, bucket, grilles, and drainage path, and avoid dismantling clean parts merely to satisfy a generic calendar.

The TP50 measures indoor temperature and relative humidity and shows dry, comfort, and wet indicators. It records high and low readings and refreshes measurements every 10 seconds. The unit includes a tabletop stand, magnetic back, Fahrenheit or Celsius selector, and one AAA battery for flexible room placement.
Check On AmazonIf you click this link and buy, we earn a commission at no additional cost to you.
Route persistent odor, icing, leakage, or no-water performance to troubleshooting instead of deeper disassembly
Cleaning can fix a clogged airflow path, dirty bucket, or residue in an owner-serviceable drain component, but it is not a universal repair. If the unit still smells strongly after the filter, bucket, grilles, and approved drainage parts are clean, the source may be somewhere you cannot safely access. Recurring icing, water leaking into the cabinet, abnormal noise, overheating, or a machine that runs without collecting water can point to operating conditions, drainage, sensors, fan behavior, or refrigeration faults rather than simple dirt. Going deeper with a screwdriver does not make the diagnosis more reliable.
Use the symptom to choose the next path. If the machine is operating but not removing moisture as expected, follow the checks in why a dehumidifier may not be collecting water before assuming internal cleaning is the answer. If the problem is placement, settings, drainage setup, or normal operation, return to how to use a dehumidifier. Contact the manufacturer or qualified service for damaged cords, smoke, burning odor, exposed wiring, water reaching electrical areas, uncontrolled operation, or work the manual reserves for service personnel.
Service stop: Do not open the cabinet to chase a persistent smell, leak, icing problem, or loss of water collection unless the exact manual explicitly provides an owner-level procedure. Do not bypass switches or safety devices to make the machine run during inspection. Do not reach into energized openings. When routine cleaning is complete, unresolved internal symptoms belong to troubleshooting or service.
That boundary keeps cleaning in its proper role. Routine maintenance should restore owner-serviceable parts. It should not become an improvised repair strategy for unresolved symptoms. A clear stopping point is part of safe appliance ownership.

The H5075 combines a temperature and humidity display with Bluetooth app monitoring. The listing specifies remote monitoring up to 164 feet and up to two years of stored data for export. Its temperature and humidity graphs can help document room conditions while you troubleshoot persistent performance changes before moving to service.
Check On AmazonIf you click this link and buy, we earn a commission at no additional cost to you.
Make cleaning access part of the next dehumidifier buying decision
Cleaning is easier when the machine was designed with ownership access in mind. A filter that slides out without moving the entire unit, a bucket with reachable corners, a documented pump filter, and a drain connection that can be checked without opening the cabinet all reduce maintenance friction. Those details rarely dominate the product listing, but they change how likely you are to keep the machine clean after the novelty of a new appliance has worn off. Capacity and moisture-removal claims still matter, but they do not tell you how awkward the unit will be to maintain.
When comparing your next machine, use the manual as part of the buying evidence rather than waiting until the first cleaning session. The broader dehumidifier buying guide connects room fit and ownership needs, while the questions below focus on cleaning access. Easier access can matter more for a machine that will run heavily, sit near lint or dust, or use a pump that needs owner attention. Extra access points are not automatically better, however, if they add parts you never need to service.
- Can the air filter be removed without moving or tilting the whole unit?
- Does the manual clearly state whether the filter is washable or replaceable?
- Can the bucket be rinsed and wiped without awkward inaccessible corners?
- If the model has a pump, is the pump filter actually owner-accessible?
- Can the drain hose be disconnected and checked without opening the cabinet?
- Does the manual define a clear boundary for internal dirt, leaks, and electrical faults?
These small buying questions become recurring ownership work. Easier access can reduce maintenance friction without adding a feature you never use. The best fit matches its cleaning needs to your space, access, and routine. That matters more than feature count alone.

This 50-pint Frigidaire dehumidifier includes a built-in pump and an easy-to-clean washable filter. It also provides custom humidity control. The front-loading bucket has a carrying handle and splash guard, giving buyers concrete maintenance-access details to consider alongside moisture-removal capacity.
Check On AmazonIf you click this link and buy, we earn a commission at no additional cost to you.
Final Thoughts: clean the parts the manufacturer expects you to clean
The safest cleaning routine is intentionally simple. Identify the exact model, unplug it, and clean only the filter, bucket, grilles, and drainage parts the manufacturer assigns to the owner. Let washable pieces dry as required and reinstall them correctly. That protects airflow and the water path without creating a new electrical, leakage, or fit problem.
Generic chemical recipes and internal coil shortcuts sound thorough because they reach farther into the machine. Farther is not automatically better. If the manual does not give you an owner procedure for a part, treat that as a boundary. When water, electrical components, cabinet disassembly, or the sealed refrigeration system are involved, support or qualified service is the safer next step.

These reusable microfiber cloths are designed to be absorbent, lint free, streak free, and non-abrasive. Each cloth measures 16 by 12 inches, and the selected pack contains 24 cloths in three colors. The washable cloths are a simple fit for routine owner-accessible wiping when the dehumidifier manual calls for a soft or lightly damp cloth.
Check On AmazonIf you click this link and buy, we earn a commission at no additional cost to you.
FAQs
🧼 What should I use to clean a dehumidifier bucket?
Use the cleaner named in the exact model manual. Many manufacturers specify mild soap or detergent and water, but instructions differ, so do not assume vinegar, bleach, or another chemical is universally approved.
🧽 Can I wash a dehumidifier filter with water?
Only if the manual identifies that filter as washable and gives a water-cleaning method. Let it dry as required before reinstalling it, and replace rather than wash a filter that is specified as disposable.
🌬️ Can I vacuum the inside of a dehumidifier?
Use a vacuum only where the exact manual permits it, such as an exterior intake or outlet grille on some models. Do not remove housing panels or push a vacuum tool into internal assemblies just because dust is visible.
💧 Why does my dehumidifier bucket smell even after I empty it?
Residue can remain on the bucket, float area, splash guard, drain path, or another owner-accessible wet surface. Clean those parts by the model instructions; if a persistent odor appears to come from inside the closed cabinet, move to manufacturer support rather than deeper disassembly.
🧊 Should I clean the coils if my dehumidifier is icing up?
Do not assume icing means the coils need owner cleaning. Check the filter, airflow, room conditions, and the troubleshooting steps for the exact model, then use service support if the symptom persists.
🔌 How long should I wait before plugging a dehumidifier back in after cleaning?
Follow the drying and reassembly instructions for your model rather than using one universal waiting period. Washable filters and other rinsed parts should be dry to the degree the manufacturer specifies before the unit is powered again.
References and Sources
- Midea dehumidifier user manual: Verifies unplugging before cleaning, approved grille and case cleaning, bucket care, washable filter steps, pump-filter cleaning, and the owner service boundary.
- Frigidaire dehumidifier clean and care: Verifies cabinet moisture precautions, mild soap and water for the bucket, and model-specific bucket access details.
- GE dehumidifier cleaning and maintenance: Verifies model-dependent reservoir, filter, grille, drying, and filter-reminder instructions.
- Tom’s Guide dehumidifier cleaning article: Provides independent editorial context for the common question of internal coil cleaning and unnecessary disassembly.