A dehumidifier works best when airflow, a humidity target, and a dependable water path are settled before performance is judged. Placement and drainage rules vary by model, so the manual should control clearance, hose routing, pump use, transport, and restart requirements. The humidity setting is a target that can make the compressor cycle, not a percentage of available power, while a full bucket can stop normal water removal. You should finish knowing where to put the unit, how to drain it, what normal cycling can look like, and when the next step is cleaning, sizing, troubleshooting, or service.
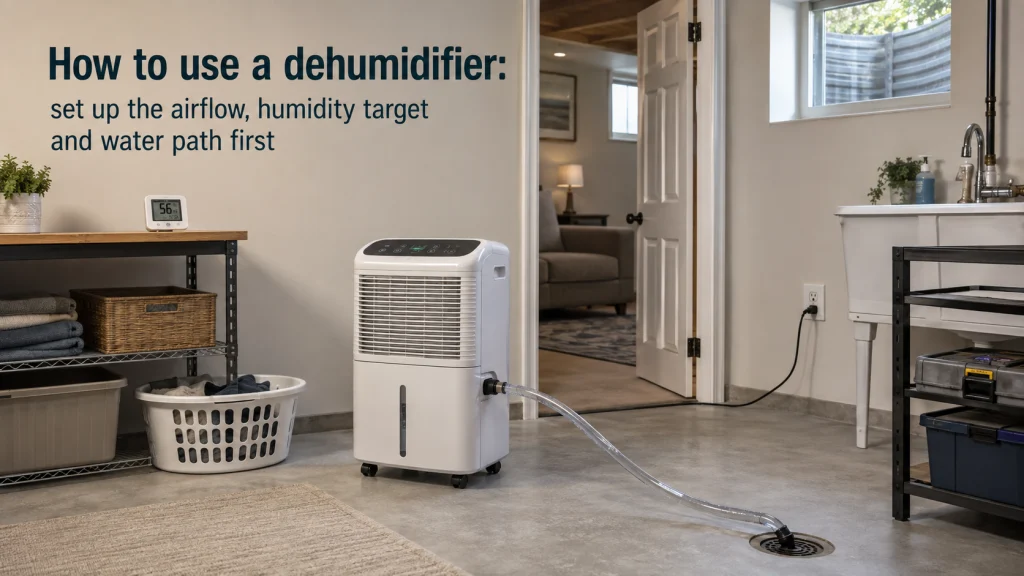
A correctly sized dehumidifier still needs an airflow path and a water path
The machine is out of the box, the wheels are on the floor, and the first problem is suddenly not capacity. It is where the dehumidifier can sit without a sofa blocking the intake, whether the warm outlet air has room to move, and what happens when the bucket fills while nobody is watching. Learning how to use a dehumidifier starts with those household details because even a correctly sized unit can be undermined by a bad location or a water path that does not work. The practical question is simple: where can the machine breathe, and where can the collected water go without creating another chore or hazard?
Check that operating path before changing modes or lowering the humidity target. The surface and orientation need to match the instructions for the unit, the vents need their specified clearance, and the cord needs an approved receptacle. Then decide whether water will stay in the bucket, flow to a lower drain through a supported gravity connection, or move through a built-in pump when that feature is actually provided. This prevents a common first-use mistake: treating a setup problem as if it were a settings problem. Placement is part of owning air quality appliances, because airflow, drainage, heat, and access can determine whether the equipment works smoothly in the room.
- Confirm the model number and locate the correct use and care instructions.
- Check the required surface, orientation, intake clearance, and discharge clearance.
- Decide whether the goal is one room or connected spaces that can exchange air.
- Choose bucket, gravity drain, or supported pump operation before relying on unattended drainage.
- Set a humidity target, then judge the room condition rather than bucket volume alone.
- Stop if water is reaching electrical areas, the cord is damaged, or the unit shows abnormal heat, smoke, or a burning odor.
Portable dehumidifiers do not all move air or drain water the same way. Intake direction, discharge direction, drain fittings, and pump hardware can change what counts as a workable location. Settle those physical requirements before furniture, storage, or the nearest empty corner makes the decision for you. Once airflow and water removal are reliable, the controls become much easier to interpret.
Identify the exact model before copying generic advice
Generic advice is useful for understanding the job, but it is weak evidence for exact setup. One model may discharge upward and tolerate a wall behind it, while another needs open space where a rear or side outlet would otherwise be restricted. Drain fittings, pump controls, bucket interlocks, fan behavior, storage instructions, and allowed operating modes can also differ within the same brand. Use the model number on the product label to find the correct manual rather than assuming a video or article about a similar-looking machine applies.
That distinction matters most where water and electricity meet. Do not bypass a full-bucket switch, force a bucket into place, modify a drain port, or create an improvised electrical arrangement because another unit appears to work that way. If the manual reserves a task for service personnel, the owner-level path ends there even if the housing looks easy to open. Using a dehumidifier safely is less about memorizing one universal setup and more about knowing which parts of the routine are model-dependent.
Place the unit so intake and discharge air can move freely
A practical location gives the unit access to humid room air without hiding either side of its airflow path. ENERGY STAR notes that placement depends partly on discharge design, which is exactly why a universal wall-clearance rule is unreliable. Keep furniture, curtains, stored boxes, dust-producing equipment, and other obstructions away from the intake and outlet according to the manual. A location that is visually tidy but starves the grille is not a successful installation.
The supporting surface and orientation matter too because the machine contains water and moving refrigeration components. Use the surface type and operating position specified by the manufacturer, and avoid locations where standing water could reach the unit or where the drain hose creates a trip route. Leave enough access to remove the bucket, inspect the filter, and reach the controls without shifting the unit every time routine care is needed. Good placement is therefore a usable operating position, not simply the smallest footprint where the cabinet can be squeezed.
Decide whether you are treating one room or connected spaces
An open interior door is not automatically right or wrong because the treatment goal changes the answer. If one damp room is the priority, enclosing that space can keep the machine focused on a smaller air volume instead of continuously exchanging air with the rest of the home. If the goal is to reduce humidity across connected rooms, air has to move between those spaces or the dehumidifier cannot affect an isolated room behind a closed door. Haier’s support guidance makes the same practical point for adjacent enclosed areas: without adequate air circulation, the nearby space may see little benefit.
| Operating goal | Interior-door approach | What to verify |
|---|---|---|
| Target one problem room | Keep the treatment area more contained when that matches the room and manual guidance. | Airflow around the unit, room closure, and whether the moisture source is inside that room. |
| Treat connected spaces | Allow a real air path between spaces rather than assuming humidity will move through closed doors. | Door openings, circulation, room layout, and whether one portable unit is appropriate for the total load. |
Laundry drying is a useful example because it creates a concentrated moisture load instead of a steady background condition. If you are using a dehumidifier in a room with drying clothes, keep the treatment area defined, preserve airflow around both the appliance and the laundry, and use any dedicated laundry mode only as the manufacturer describes it. Do not assume the label means maximum performance, a fixed runtime, or permission to crowd the unit closer to wet fabric. The extra moisture can also make the machine run longer than it does during ordinary room control, so compare the workload with the unit’s capacity instead of judging it by the usual daily cycle.
This is also where placement can reveal a capacity problem rather than a setup problem. A portable unit intended for a single area may struggle when an open-door strategy quietly turns its assignment into several rooms with a much larger moisture load. If the space being treated has expanded beyond the original purchase assumptions, revisit the dehumidifier buying guide before blaming the controls. Define the air volume you are actually asking the machine to treat, then judge the setup inside that boundary.
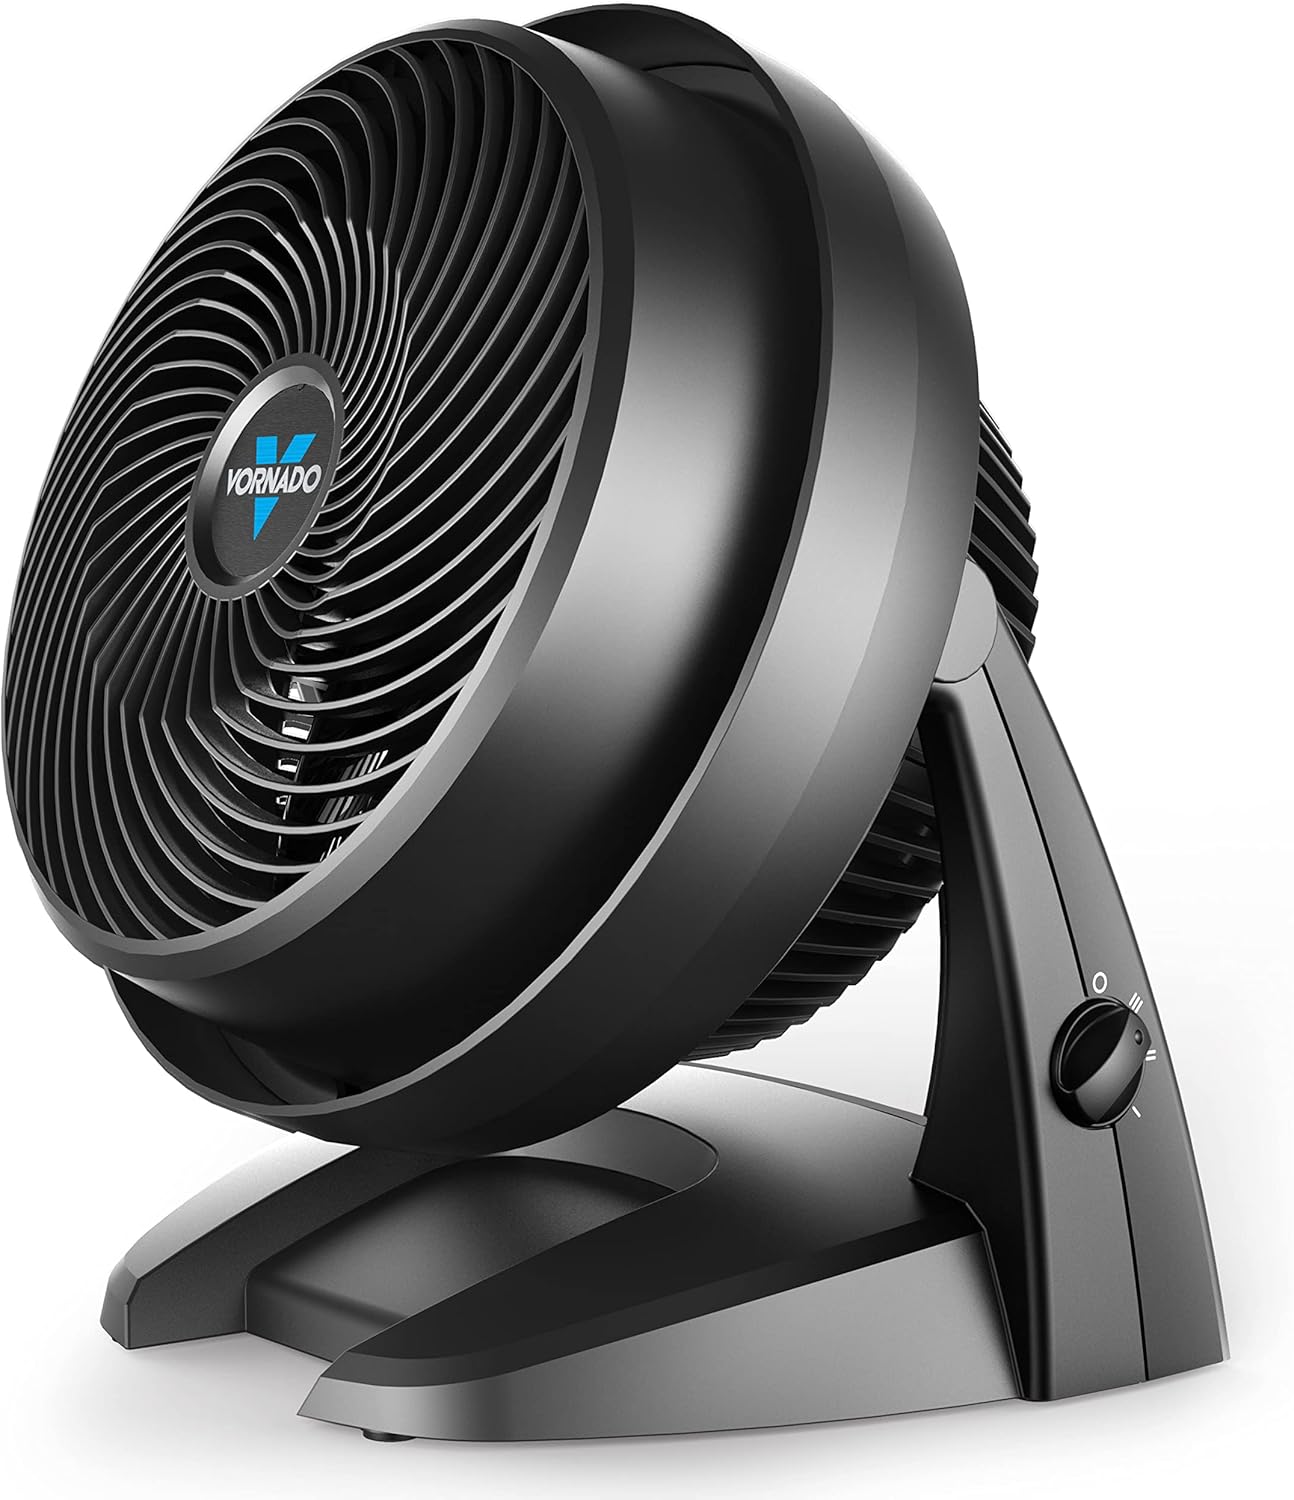
The Vornado 630 is a 9-inch air circulator with three speed settings and an adjustable tilt head. It is designed to move air around a room rather than remove moisture itself. That makes it a useful companion when connected spaces need better air exchange around a portable dehumidifier.
Check On AmazonIf you click this link and buy, we earn a commission at no additional cost to you.
Manage exterior doors and windows so you are not drying outdoor air
Exterior openings are different from an interior door used to connect rooms. ENERGY STAR recommends closing doors and windows to the space being dehumidified while the unit runs because uncontrolled outdoor air adds a continuing moisture load. That does not mean a home should never be ventilated, but ventilation and dehumidification are separate decisions that should not accidentally work against each other. If an exterior window is left open in humid weather, the machine may spend its effort treating incoming air instead of stabilizing the intended room.
This is also one of the simplest ways to avoid unnecessary runtime. Keep the treatment area no larger than the job requires, correct avoidable moisture sources when possible, keep the filter and airflow path clear, and let the humidistat cycle the unit instead of defaulting to nonstop operation. A lower target is not automatically a more efficient target, and a timer does not save energy if it simply forces the room to drift humid and then makes the machine recover repeatedly. Efficient operation comes from reducing the moisture load and letting the controls manage a sensible target, not from chasing the longest or shortest runtime.
Treat the humidity setting as a target, not a power control
The number on a humidistat is a relative-humidity target, not a command telling the compressor to work at that percentage of maximum power. ENERGY STAR explains that a built-in humidistat can cycle the dehumidifier on and off as the room reaches and moves away from the selected target. Some automatic, continuous, laundry, or comfort modes can change whether the target is adjustable or how aggressively the unit runs, so the mode name alone does not tell you exactly what the machine will do. If a mode changes the available controls, use the description for that model rather than assuming “continuous” or “laundry” means the same behavior across brands.
Timers deserve the same treatment. A timer usually changes when the unit starts or stops; it does not replace the humidity target, fix poor placement, or make an unsuitable drain route safe for unattended operation. For ordinary use, set the humidity target first, choose a mode that matches the job, and use the timer only when its documented behavior helps the routine. Running longer or selecting a more aggressive mode can increase energy use without solving a blocked grille, full bucket, undersized unit, or continuing moisture source.

The TempPro TP50 displays indoor temperature and relative humidity on a compact digital screen. It provides a separate room reading that can be compared with the target selected on a dehumidifier. This is useful for checking humidity trends without treating the dehumidifier display as the only reference point.
Check On AmazonIf you click this link and buy, we earn a commission at no additional cost to you.
Choose bucket, gravity drain, or pump operation around the real water path
Water removal is part of normal operation, not a detail to solve after the machine is already running. Bucket mode is simple because the unit collects water internally and typically stops when the bucket is full or incorrectly seated, but it creates a recurring carrying and emptying task. Gravity drainage can remove that task when the model supports a hose and the route continuously descends to an approved drain point. A built-in pump can handle a different route on supported models, but pump connections and height limits are model-specific and must come from the manual.
| Water path | Best fit | Main check before use |
|---|---|---|
| Bucket | You can access the unit easily and do not mind carrying collected water. | The bucket seats correctly, the full-bucket control works normally, and the carrying route is practical. |
| Gravity drain | A supported drain connection can reach a lower drain point without an uphill section. | The manual-approved hose connection, continuous downward route, secure outlet, and trip-free path. |
| Built-in pump | The exact model includes pump capability and the drain cannot be reached by gravity alone. | The correct pump hose, connection, routing limit, control mode, and failure instructions for that model. |
Midea’s general dehumidifier support is a useful example of why these methods should not be blended together. Its gravity-drain guidance depends on the hose staying below the unit’s drain point, while pump-equipped machines use a different connection and operating setup. Do not add a pump assumption to a model that only provides gravity drainage, and do not force a gravity hose uphill because the drain is conveniently located there. The best drainage method is the one the exact machine supports and the household can maintain without leaks, kinks, electrical exposure, or an awkward water-carrying routine.

A smart water leak detection system with a Wi-Fi gateway and four sensors for monitoring areas such as kitchens, bathrooms, basements, and laundry rooms. The sensors use top and bottom probes to detect both dripping and standing water, while the system can send app, email, and SMS alerts when a leak is detected. It also provides a loud 100dB local alarm, IP66 water resistance, and long-range wireless communication for broader household coverage.
Check On AmazonIf you click this link and buy, we earn a commission at no additional cost to you.
Expect cycling, fan changes, and warm exhaust when the model says they are normal
A dehumidifier does not need to run its compressor continuously to be doing its job. Once the humidistat senses that the room has reached the selected target, cycling can be normal, and some models keep the fan operating differently from the compressor. ENERGY STAR also notes that the air immediately around a working dehumidifier may feel warmer because moisture removal adds some heat to the surrounding space. Those behaviors should be compared with the exact manual before they are treated as symptoms.
Bucket volume is also a poor standalone scorecard. The amount of water collected changes with room humidity, temperature, moisture load, setpoint, airflow, operating mode, and how long the unit actually needs to dehumidify. A machine can collect less water because the space is already closer to target, not because the unit has stopped working correctly. Judge performance by the room condition, humidity trend, normal control behavior, and absence of fault symptoms rather than by how dramatic the next bucket looks.
Use a separate humidity check when the built-in reading looks implausible
A built-in humidity display is useful for control, but the number it shows is measured where the machine’s sensor is located, not at every point in the room. Air near the intake can differ from air near an exterior wall, window, laundry area, or another moisture source, especially when circulation is uneven. If the display seems inconsistent with the room condition, a separate household hygrometer can provide a second reference rather than forcing you to guess. ENERGY STAR specifically suggests a separate hygrometer when a unit lacks a useful built-in RH display.
Treat that second meter as a practical comparison tool, not laboratory evidence. Place it where it can represent the occupied area reasonably, keep it away from obvious local moisture or heat sources, and compare trends rather than obsessing over a tiny disagreement between two consumer sensors. If both readings stay high despite correct airflow, drainage, settings, and room closure, the problem may be capacity or an ongoing moisture source rather than display calibration. A separate reading is most useful when it helps you choose the next check, not when it becomes another number to chase.

The AcuRite 00613 shows indoor relative humidity and temperature on a compact digital display. It can serve as a second reference when a dehumidifier's built-in humidity reading looks implausible. Comparing room trends with a separate meter can help distinguish sensor-location differences from a persistent moisture problem.
Check On AmazonIf you click this link and buy, we earn a commission at no additional cost to you.
Keep the filter, tank, and hose on the model’s maintenance routine
Normal operation gradually adds maintenance tasks because air carries dust and collected water leaves wet surfaces behind. A dirty filter can restrict airflow, a poorly seated bucket can interrupt operation, and a drain hose can create trouble if it becomes kinked, blocked, loose, or routed outside the conditions allowed by the manufacturer. Follow the exact maintenance schedule and cleaning method for the model rather than applying one frequency or chemical to every machine. The operating routine should include quick checks that keep airflow and water removal working as designed.
Detailed washing, tank care, grille cleaning, and model-specific maintenance belong in the separate article on how to clean a dehumidifier. For everyday use, keep the filter accessible, inspect the bucket seating, and make sure the chosen drain path has not been disturbed by storage, furniture, pets, or household traffic. Do not open electrical housings or attempt internal refrigeration, wiring, motor, or control-board work as part of routine cleaning. Maintenance should restore normal owner-accessible airflow and drainage, not become a repair project.

The OXO Good Grips Deep Clean Brush Set includes a larger cleaning brush and a smaller detail brush with nylon bristles. The smaller tool is suited to tight crevices, while the larger brush handles broader accessible surfaces. Use it only on owner-accessible dehumidifier areas where the exact model cleaning instructions permit brushing.
Check On AmazonIf you click this link and buy, we earn a commission at no additional cost to you.
Route persistent humidity or an empty bucket to the right next check
If the room stays humid, first verify the setup variables that can make a healthy unit look ineffective. Confirm unobstructed airflow, correct bucket seating or drainage, the intended humidity target, the treatment area, the room’s moisture sources, and any operating-temperature limits in the manual. Frigidaire’s support guidance similarly starts with installation, airflow, bucket status, the RH setting, and filter condition before escalating a no-water complaint. That order keeps normal operation checks separate from internal repair.
| What you observe | Owner-level next check | Where to route next |
|---|---|---|
| The room remains humid across the intended treatment area. | Verify airflow, doors and windows, moisture sources, setpoint, and whether the unit is sized for the actual space. | What size dehumidifier do I need? |
| The unit runs but the bucket stays unexpectedly empty. | Check the selected mode, setpoint, bucket seating, drain configuration, room conditions, and filter before assuming a failure. | Dehumidifier not collecting water |
| You see leakage near electrical areas, smoke, sparks, exposed wiring, abnormal overheating, or a burning odor. | Stop using the unit and disconnect it only when that can be done safely. | Use manufacturer support or qualified service rather than opening the machine. |
Do not defeat bucket switches, bypass safety controls, improvise wiring, or open the cabinet to chase a symptom. A hard mechanical lock, uncontrolled operation, repeated electrical fault, water reaching electrical components, or a service-only error is a stop point rather than an invitation to keep experimenting. Likewise, persistent room humidity can be a sizing or building-moisture issue even when the appliance itself is functioning normally. The right troubleshooting route is the one that separates setup, capacity, maintenance, and service instead of treating every disappointing result as the same failure.

The TempPro TP49 displays temperature and relative humidity and refreshes its readings every 10 seconds. Its comfort indicator gives a quick visual category for the measured room conditions. During troubleshooting, a separate room reading can help confirm whether humidity is actually staying high before settings, airflow, or capacity are blamed.
Check On AmazonIf you click this link and buy, we earn a commission at no additional cost to you.
Store and restart the unit according to the manual
Seasonal shutdown is part of ownership because a dehumidifier can retain water, dust, and hose connections even after normal use ends. Empty and dry the owner-accessible water path as the manual directs, clean the permitted components, remove or secure hoses as required, and store the cord without damaging it. Keep the unit in the orientation and storage conditions specified by the manufacturer rather than laying it down simply because that fits a shelf better. A compact storage position is not worth creating a restart problem.
Restart rules matter especially if the unit has been transported or stored in a different orientation. Some designs require a particular upright-rest procedure before operation, so verify that instruction for the exact model instead of applying a remembered rule from another appliance. Recheck the bucket, filter, hose connections, cord, and airflow space before returning the unit to service. If transport damage, leaking, damaged wiring, or an abnormal mechanical condition is visible, stop and use the manufacturer’s support path rather than testing the machine to see what happens.

VELCRO Brand ONE-WRAP Cable Ties are reusable 8-Inch x 1/2-Inch straps supplied in a 100-pack. They can keep a power cord bundled during storage without using a permanent single-use tie. Use them only for loose cord organization, avoiding sharp bends or crushing while following the dehumidifier manual storage instructions.
Check On AmazonIf you click this link and buy, we earn a commission at no additional cost to you.
Final Thoughts: good operation starts with airflow, settings, and a reliable water path
Using a dehumidifier well is mostly a matter of matching the machine to a clearly defined space and then giving it the conditions its design expects. Start with the exact model, protect its airflow, manage exterior openings, choose a realistic humidity target, and make the water path dependable before you judge performance. Bucket, gravity drain, and pump operation can all be useful, but they create different ownership routines and should never be treated as interchangeable. Once those pieces are settled, normal cycling and changes in bucket volume are much easier to interpret.
If the room remains humid, do not keep lowering the setpoint without checking what the machine is actually being asked to do. Revisit the treatment area, moisture source, airflow, filter, drainage, room conditions, and capacity, then route a true no-water symptom to the appropriate troubleshooting path. Stop at the service boundary when water reaches electrical areas or the unit shows electrical, overheating, mechanical, or uncontrolled-operation symptoms. A good setup is not the one with the most aggressive setting; it is the one that can move air, control toward a sensible target, and dispose of water reliably.
FAQs
These questions focus on normal setup after the dehumidifier is already in the home. Airflow design, drainage hardware, controls, and room layout can change the answer from one model to another. Use general principles to choose the next check, then use the exact manual for physical limits. That approach is more reliable than memorizing one clearance, setting, or drain rule.
Keep normal operation separate from cleaning, sizing, and fault diagnosis. A humidity target cannot correct a blocked filter, full bucket, poor drain route, or an undersized unit. An open interior door can help air exchange while also increasing the space the machine must treat. When the problem crosses into another issue, follow the more specific troubleshooting or sizing path.
📍 Where should I place a dehumidifier in a room?
Use a location that preserves the model’s required intake and discharge airflow and gives the water a practical path. Do not assume one wall-clearance distance fits every design.
🚪 Should interior doors be open or closed when using a dehumidifier?
Contain the space when one room is the target. Open an interior path only when connected spaces are intentionally being treated and the unit can handle that larger load.
🪟 Should windows stay closed while the dehumidifier runs?
For normal dehumidification, manage exterior openings so humid outdoor air is not continually replacing the moisture being removed. Handle separate ventilation needs deliberately.
💧 What humidity should I set my dehumidifier to?
Use a reasonable target that fits the room, climate, moisture source, and model guidance rather than one universal number. Adjust after airflow and drainage are confirmed.
🪣 Is continuous drainage better than using the bucket?
Only when the unit supports it and the hose route is reliable. Bucket, gravity drain, and pump operation each create different setup and maintenance work.
🔁 Why does my dehumidifier turn on and off?
Cycling can be normal when the humidistat is controlling toward the selected target. Compare the fan and compressor behavior with the exact manual before treating it as a fault.
References and Sources
These references are included only for operating claims that need evidence beyond general household reasoning. ENERGY STAR supports the broad humidity, cycling, placement, drainage, electrical-safety, and warm-exhaust principles used here. Manufacturer support pages show why drain methods, controls, airflow, and no-water checks cannot be treated as identical across models. The exact manual still takes priority for clearance, pump limits, maintenance, transport, and other model-specific requirements.
- ENERGY STAR dehumidifier guidance: Supports general placement, exterior-opening, drainage, electrical-safety, humidistat-cycling, separate-hygrometer, and warm-exhaust guidance.
- Midea dehumidifier support: Shows the difference between humidity controls, gravity drainage, pump-equipped models, and bucket-related error conditions.
- Frigidaire no-water support: Supports checking installation, airflow, bucket status, RH settings, and filter condition before escalating a no-water symptom.
- Haier dehumidifier placement support: Supports enclosed-space operation and the need for air circulation when attempting to affect an adjacent area.
Use the links for the general point each one actually verifies, then return to the manual for your own unit. A similar cabinet or shared brand name does not prove identical airflow, drainage, pump capability, or control behavior. If model-specific instructions conflict with generic support material, follow the exact manual or ask the manufacturer to clarify the requirement. That keeps owner-level setup useful without turning broad advice into an unsafe specification.